Thursday, June 25, 2020

HAGALAKAI/KARELA/BITTER GOURD CHUTNEY


This is a wonderful tasting chutney, a combination of bitter, sour and sweet. Goes very well with hot rice and ghee and can be a good accompaniment with chapathi etc.


Ingredients:

Bittergourd                        1/2 kg
Onions                              4-5 medium
Salt                                   4 level teaspoons
Sarina pudi                       4 teaspoons (heaped)
Tamarind                          1 big lemon sized or 1 1/2-2 tablespoons thick paste 
Jaaggery                           1 cup (powdered) or ¾ cup thick syrup

For seasoning:       

Oil                                     4-5 tablespoons
Mustard seeds                  2 teaspoons
Curry leaves                     8-10
Ingu/asafetida                 ¼ teaspoon
Turmeric                           ¼ teaspoon 

Procedure:

Chop bitter gourd into about 1” pieces and slice the onions. Let the volume of sliced onions be about half that of chopped bitter gourd.


Run them in the mixer along with salt and tamarind into a coarse mixture.


Now heat oil in a thick pan. Add mustard seeds. When they sputter add curry leaves, turmeric and asafetida. And immediately add the ground paste. Fry till the mixture does not smell raw any longer and it leaves the sides of the pan.

Now add jaggery and mix well. Add sarina pudi and mix well again and cook till it thickens and leave the sides of the pan.


Allow it to cool and store in bottles or steel boxes.

Will stay good in the fridge for months.

Friday, June 12, 2020

WHOLE WHEAT BREAD


I started baking bread more than 15 years back.

We like bread, but we prefer whole wheat bread to that made using maida/refined flour,

It is very difficult to find whole wheat bread in the market. Even the ones we get with the label `Wheat bread’ are also a mix of maida and wheat flour, I guess.  Because if it is only wheat bread, it feels heavy to handle whereas the only maida or wheat-maida mix bread is lighter. A local baker even told me that one has to add 50% maida or else the bread will not rise!

Once I came across a recipe for whole wheat bread in a news paper.  And that was the take off point for my bread making! I tried it and on repeated trials, succeeded in getting a perfect loaf of bread! And it does rise without adding maida!

If you go through the recipe, you may feel that it a difficult task. But it is not so. It is time consuming that is all. In the sense, you will have to wait for at least two to three hours for the flour to rise and nearly about half an hour for baking. Including the preparation time, the process takes about four to five hours.

Here is the recipe.

Ingredients:

Whole wheat flour                                             4 cups
Dry yeast                                                           1 teaspoon
Jaggery powder/honey                                      2 teaspoons
Salt                                                                    1 teaspoon                  
Warm water                                                       About 1 ½ cups
Sesame seeds (optional)                                    2 teaspoons

Procedure:

Add salt to flour, mix well.

Dissolve jaggery in about ¼ cup of water. Heat this to a lukewarm temperature.  If you take honey, add lukewarm water to it and stir well.

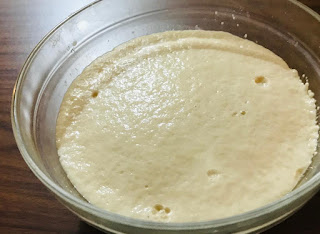
Add dry yeast granules to this and mix well.  Allow it to rise. It takes about 15-20 minutes to rise.


Next add this to the flour and mix well.

Now add required amount of warm water and mix well. Let the consistency be a bit softer than the flour you mix for making chapathis. Now you have to knead this very well. The more you knead, the more it rises. I knead it for about ten minutes. 

After kneading, cover it with a warm cloth, keep it in a warm place and allow it to rise. If the room temperature is not warm, I keep this in the oven and turn the oven on to about 20 degrees Celsius and leave it for 2 to 3 hours. The flour should rise to nearly three times that of the original size.


Baking:

Keep a greased baking trey ready.

Now knead the flour again for one or two minutes. Better dip your hand in water once before you start kneading since the flour might stick to your hand and make it difficult to knead. Now roll the flour with hand to fit into the trey and then transfer this to the trey. 

Now again cover with warm cloth and allow it to rise in the trey for about half an hour.

Next sprinkle sesame seeds uniformly on the flour. These seeds give a good taste to the bread when they get roasted during baking. 


Preheat the oven to 200 degrees Celsius for five minutes. Bake for about 25 minutes at this temperature.

To check if the bread is done, insert a knife in the middle of the loaf. If it comes out clean it means that it is done. To check further, take out the trey and knock on the bread lightly with fingers. If it gives a hollow sound, it means the bread is done.

Now reverse the trey and transfer the loaf to a plate. Wrap the bread with wet cloth for about 10 minutes so that the bread crust doesn’t get hard.

Cut the bread to slices when cool.


Friday, May 29, 2020

TOTAPURI MAVINAKAI/MANGO CHUTNEY


Mango season is never complete without this mouth watering chutney. This tastes great with hot rice, and tastes wonderful with a dash of ghee! Goes well  also with chapathi and even bread. For those who have tasted it, the very name and the look or even a picture of it makes them salivate for sure!

This  chutney can be prepared in bulk and stored during the season. It can stay in the fridge for months. It is very easy to make too.

It is a good idea to use fresh, hard, raw totapuri mango to make this chutney.  So, when  you buy you better select the correct ones.

The other  variety of mango used to make pickles is very sour compared to totapuri variety and so making chutney with the former requires more quantity of jaggery. So totapuri is best suited to make this.


Ingredients:

Grated raw totapuri mango                                       2 cups
Salt                                                                           2 teaspoons
Red chili powder                                                       2 teaspoons ( I use byadagi)
*Bella/jaggery/gud  syrrup                                        ½ cup
Menthya/Methi seeds
(Roasted and powdered)                                           1 level tablespoon

For seasoning:

Refined oil                                                                 4-5 tablepoons
Mustard seeds                                                          1 teaspoon
Turmeric                                                                   ¼ teaspoon
Ingu/asafoetida                                                         ¼ teaspoon

Procedure:

Peel and grate mangoes.

Heat oil in a thick pan. Add mustard seeds. When they sputter add turmeric and ingu and immediately add the grated mango.  Add salt and mix well. Cook this on a medium flame till mango turns a little brownish and leaves the sides of the pan.


Now add chili powder and jaggery syrup.   Stir well and cook till it thickens. Allow it to cool to room temperature. Store in bottles.

*Jaggery syrup: It is better to use  jaggery syrup than use jaggery directly because it contains sand particles. To make the syrup, take one cup of powdered jaggery,  add  water just to cover it and bring to boil. When it gets completely dissolved, decant and pour the syrup to another container. Boil the solution to get one string consistency.

A suggestion: An approximate quantity of ingredients to be added is given in the ingredients list.  In case of any such chutney, it is a good idea to taste a little bit of this when done, and add whatever extra  quantity of the ingredient you like to add. Depending on how you want it to taste-  spicy, sour or sweetish you can alter the quantity of ingredients.

Tuesday, May 12, 2020

MAJJIGE HULI/PALADYA


This is a slightly sour dish made with butter milk (thin curds) and vegetables. Some like to have it as a combination with  thick ‘tovve’ ( a thick huLi/sambar), Togari nucchinunDe, etc. but it can be had with plain rice also. Only a few selected vegetables are used for this, like pumpkin, chow chow, snake gourd and sometimes even peas.

Ingredients:

Any of the above mentioned Vegetables              1 cup, cut into ½” - 1” inch cubes
Salt                                                                       1 teaspoon
Curds thick                                                            ½ cup
Water                                                                     ½ cup              
           
To be ground into paste:

Grated coconut                                                      ½ cup
Chilies                                                                    1 or 2
Ginger                                                                    1” piece
Cumin                                                                    1 level table spoon
Gram dal                                                                1 tablespoon (to be soaked 1 hour before grinding)

For seasoning
Oil                                                                           1 teaspoon
Mustard seeds                                                        1 teaspoon
Curry leaves                                                            5-6
Turmeric                                                                  1 pinch
Ingu (asafoetida )                                                    1 pinch


Procedure:

Take oil in a pan. When hot, add mustard seeds. When they sputter add curry leaves, ingu, turmeric and add vegetables. Add half a teaspoon of salt and cook. I prefer half cooked vegetables. If you wish you can cook till soft.

While the vegetable is getting cooked, grind the mentioned ingredients into fine paste. You can add a little water while grinding.

When the vegetable is cooked, add the ground mixture, the remaining half spoon of salt and boil. Add about half a cup of water if you find it very thick. Let it boil for two or three minutes. Keep stirring so that it doesn’t get burnt.

Allow it to cool.

Beat the curds well with a whisk, add water and stir well.  Pour this into the pan and mix well.
Majjige huli is ready to serve.

Note: Add  curds only when the contents of the pan are cooled and do not heat the ready majjige huli to high temperature. Hot temperature makes the curds get curdled. So you can just warm it.


Sunday, May 10, 2020

TOGARI NUCCHINUNDE (A Tur dal recipe)


Togari nucchinunde, a specialty of Karnataka, is a wonder dish made of togari bele/tuvar dal. The name of the dish implies that they are balls made of broken tur dal. Probably in olden days, when there was no the concept of supplying cleaned togari bele, grocery shops supplied  one which was a mix of whole and broken togari bele.  So, while cleaning and separating them some innovative lady must have found a unique way to use this broken bele and created this dish. Now that clean bele is available, the dish is made by soaking and grinding the whole togari bele.   It is one of the main dishes of a Karnataka meal, but made comparatively rarely. This is a protein rich, steam cooked dish and so is a very healthy dish. Very filling also. Though it is an item of main meals, it can also be used as a snack. Usually it is accompanied by another dish, majjige huli/paladya.


Ingredients
Togaribele/Tur dal                                            1 cup
Water                                                               3 cups
Salt                                                                  1 teaspoon
Ginger grated                                                  1 tablespoon
Ingu/asafoetida                                                3 or 4 pinches
Green chilies                                                    2-3
Grated coconut                                                1 cup
Menthya soppu/methi finely chopped              2 cups

Procedure:

Soak  togari bele in water for 3-4 hours.  Transfer to a colander and drain completely. See that no water remains.

Grind , ginger, green chilies, salt and ingu to a coarse paste without adding water. Then add grated coconut and run the mixer just for a few seconds so that it mixes well with the ground togari bele mixture.  Add finely chopped menthya soppu and mix well.


Now take one small fistful of the ground mixture and make balls as shown. Take a steel plate which has holes, smear with oil and arrange the balls in the plate. If you don’t have such plate you can arrange them in idli stand as shown. 


Now heat water in a pressure cooker. Place a steel ring or any other narrow vessel in the cooker. When water starts boiling, place the plate in the cooker, cover the cooker lid and steam for 10 minutes and turn off the flame. If you use idli stand, follow the same procedure.

Leave for five minutes and transfer the balls into a box.  

Serve hot with ghee and  majjige huli.

You can to eat the balls just with ghee, or mix with only rice or mix with rice and majjige huli, both.
Usually majjige huli a south Indian version of kadhi, has  in it vegetables like pumpkin, chow chow, snake gourd etc. But one used as an accompaniment of  Togari NucchinunDe can be made plain without vegetables too.

Note: One cup of  togari bele yields about 15 pieces of the dish. Serves 4-5


Saturday, May 2, 2020

MENTHYA/ METHI / FENUGREEK SPROUTS SALAD


Menthya sprouts??!! How can one eat these bitter seeds?? I know, this is the reaction of whoever has not tasted this salad! But, it is a wonderful tasting salad, very good for health too. You have to eat this to believe it! Preparing this easy too, but needs a little bit of advanced planning because I have noticed that these seeds take more time to sprout compared to our usual green gram sprouts. I can say, you soak it approximately 2 days before you plan to make this.

I am sure you would love the lovely flavour of Menthya minus its bitterness.

You need to take:

Menthya/Methi seeds                            ½ cup
Water                                                     2 cups
Salt                                                        ½ teaspoon
Lemon juice                                           1 teaspoon
Grated carrot(optional)                          2 or 3 tablespoons
Grated coconut                                      2 tablespoons
Peanuts crushed                                    2 or 3 tablespoons

For seasoning:

Oil                                                          2 teaspoons
Mustard seeds                                       1 teaspoon
Black gram                                             2 teaspoons
Ingu/ asafoetida                                     2 pinches
Curry leaves                                           3 or 4, cut into pieces
Green chilies chopped                           1 teaspoon 
Coriander leaves chopped                     2 tablespoons

Procedure:

Soak menthya seeds overnight in water. Next morning drain it completely and store in a plastic box and keep in a warm place. It is a good idea to toss it once or twice a day . So, better keep it in such a place that you notice it whenever you enter the kitchen or else you may forget it :) . By next day, you can see small sprouts shooting out. Leave it for one more day or two, tossing it, till the sprouts are about 3mms. long.  

Or

You can even tie the soaked seeds in a thin cloth. You can just open twice a day and check if they have sprouted.

When  ready, sprinkle salt  and keep aside.

Roast peanuts and crush them to small pieces and keep aside.

Heat oil in a pan, add mustard. When it sputters, add black gram  and fry till golden brown. Add  cut curry leaves, chopped green chillies, ingu, one tablespoon of coriander leaves and fry for a few seconds. Add in sprouted menthya. Add  salt and mix well. Simmer the flame and leave for about two minutes, stirring in between. Mix in grated carrot and turn off the flame. Add lemon juice. Mix well and then add roasted peanuts and grated coconut  and mix well.  Garnish with rest of chopped coriander.


Thursday, February 27, 2014

HESARU KAALU- MOONG SPROUT


Sprouted moong is a very common item in our kitchens as an ingredient to make salads, as you know.  Since it is such a healthy food item, I was just  wondering how to make a more interesting salad out of it.  Most important for me was that the raw smell of the sprout should go. So I tried this method and it so happened that the consistency of the sprouted moong also changed for better! So, try this. I am sure you will love it!

Ingredients:


Sprouted moong                                     1 cup
Salt                                                         1 teaspoon                              
Roasted peanuts                                    1 tablespoon (crushed)
Grated carrot(optional)                           1 tablespoon
Grated coconut                                       1 tablespoon
Lemon juice            
                             
For seasoning:

Oil                                                           1 teaspoon
Mustard seeds                                        1/2 teaspoon
Ingu/hing/asafoetida)                              1 pinch
Green chily                                             1 (finely cut)
Coriander leaves                                    1 tablespoon (chopped)


Procedure:

Heat oil in a  kaDai. Add mustard seeds. When they sputter add cut chilies, hing and chopped coriander leaves. Join in the sprouted moong and salt, and immediately turn off the flame. (By doing so, the moong stays crisp and this is what gives that special consistency for the dish). Stir well. Keep the kaDai closed for a few minutes. When cool add grated carrot, coconut, crushed peanuts and lemon juice and mix well. The dish is ready to serve!

By just doing this, the raw smell of the moong disappears and you can consume four times the usual quantity that you consume  This can even be more of a `between meal' very healthy snack than just a salad. Usually in mixed vegetable salads, the the proportion of sprouted moong is about one fifth  the quantity of vegetables. Here you may or may not use vegetables- choice is left to you!

A rare combination of nutrition and good taste :)

Try now!